We will move her in the z position first and then the x position. In the screenshot below, I have rotated the main
camera around and come away a little it so I can see where the box is relative to V4. I put my mouse cursor over
the parts of V4, until the hips outline lights up and then I click and hold down the left mouse button. I make
sure I really have grabbed her hip and not something else, like her hand or part of the outfit she
is wearing, and then drag her over to place her close to the box. This way though upsets the
Y values which is going to create more work for to put right afterwards, so lets not do that. Instead, once
the hip is selected, use the Hips trans dial to move V4 backwards to the box!
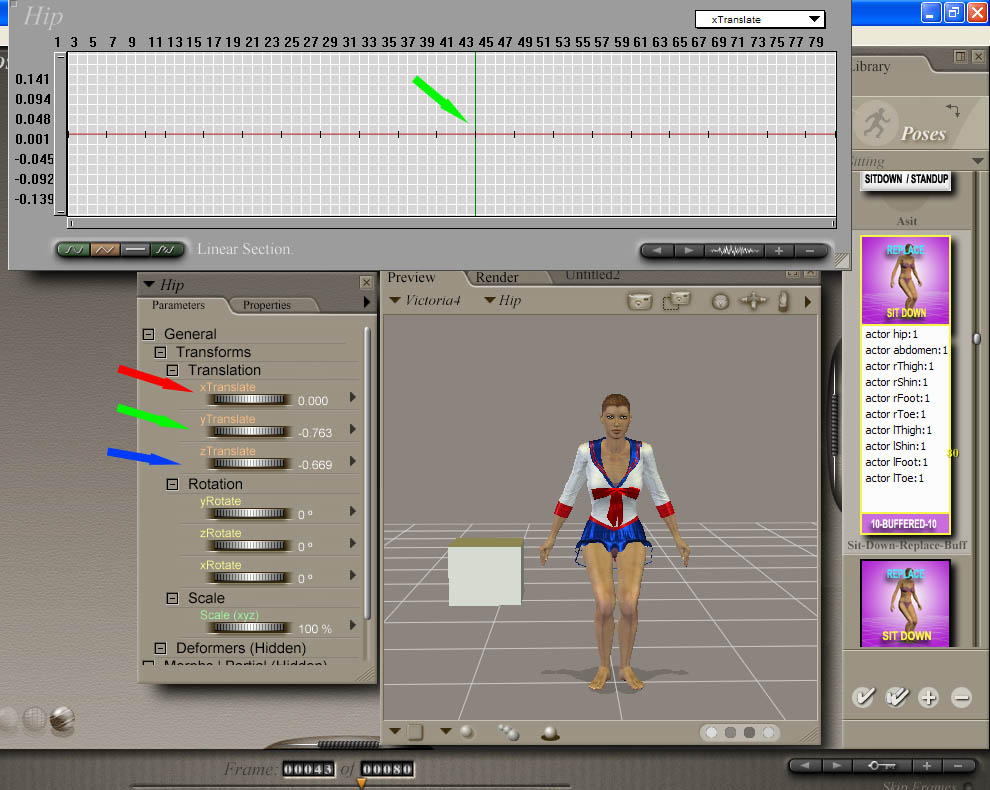
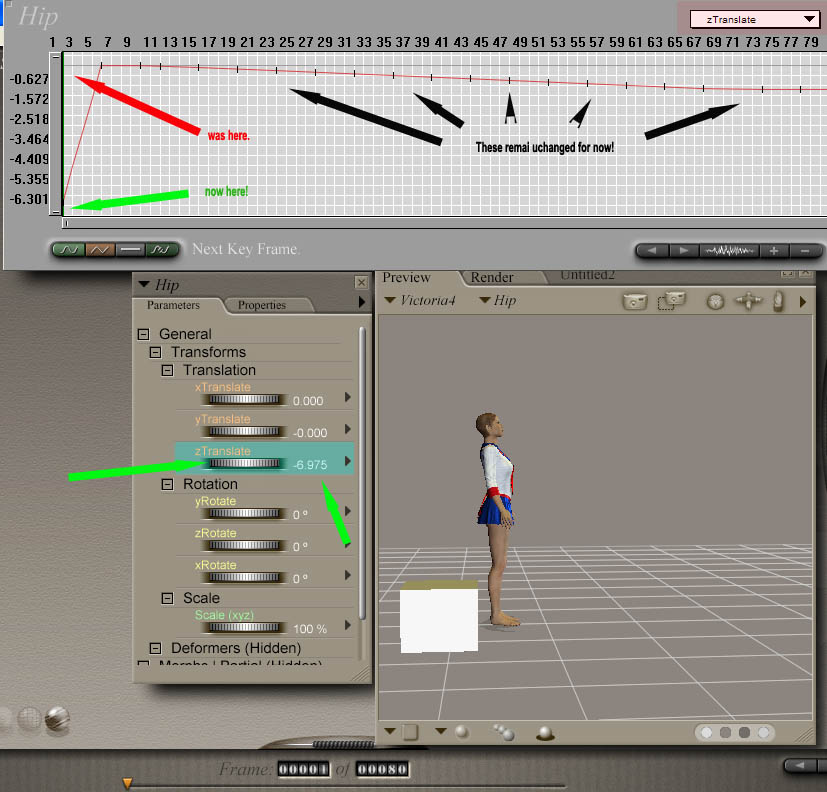
The screenshot on the right shows the result of spinning the Z translate dial. V4 has moved back much closer to
the box (well at least the fist frame of the sequence anyway, for now), and all the rest of the keyframe values
have not been disturbed.
Also, because we used the dial to move her instead of dragging her with the mouse, I am assured that the Y tans
values (up/down) for her hip have remained intact for the whole 80 frames too.
She may not be exactly where we want her to be in the Z axis yet but we can always re-adjust the Z translate value
for keyframe 1 later, after we have moved her in the X axis.
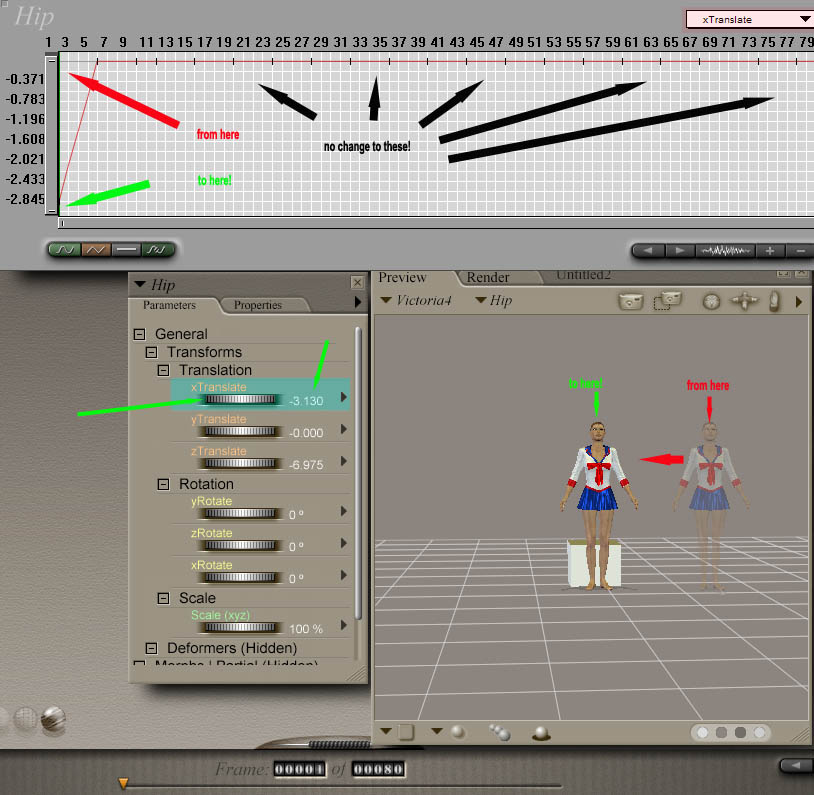
So lets turn the camera around and spin the dial on the X translate value to move her left (as viewed from the
front) so she is standing just in front of the box... |
 |
|
So, now we have V4 positioned (but only for the first keyframe), we will adjust all the other key frames for both
Z TRANS AND X TRANS in the Graph window.
We will do the X TRANS first!
Place the mouse cursor into the graph window just after and to the right of the first key frame. Hold down the
left mouse button and sweep across the graph window to the right until you have move passed the last frame. All
the keyframes, except the first one, should now be highlighted by a black filled box.
Position the cursor inside the black area below the horizontal time line and hold down the CONTROL KEY AND LEFT
MOUSE BUTTON TOGETHER. The cursor changes to two vertical arrows, one pointing up, and the other pointing down.
Move the mouse up or down to align all the keyframes (after the first one) with the very first key frame.
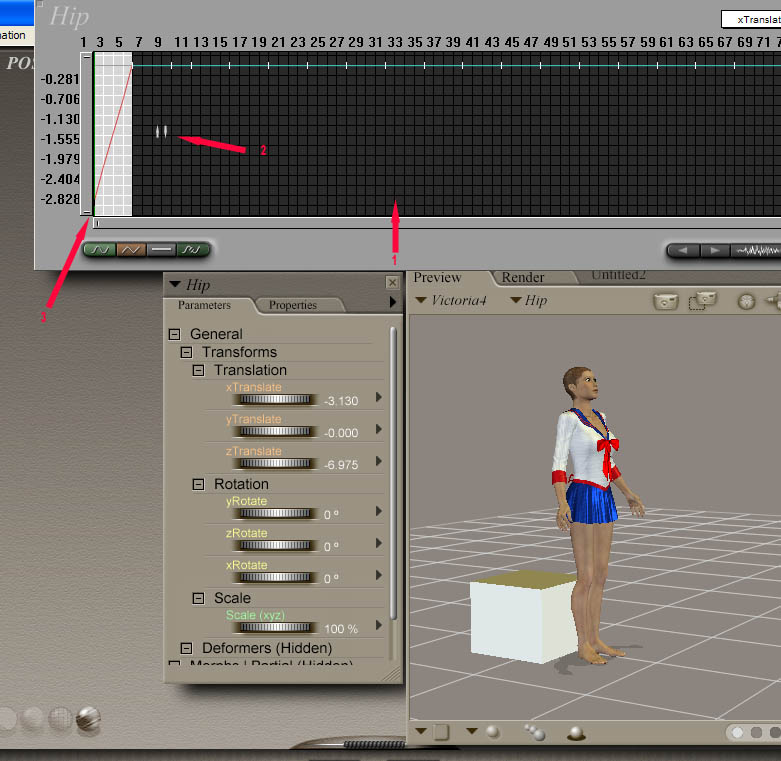
The Screenshot on the right show the position, just before I move the keyframes as a block to their new position
for the Hips X Trans.
When you move the block of keyframes, they might look aligned to the eye but you need to check each keyframe value
and adjust again if they are wrong.... {scroll down} |
|
| |
|
|
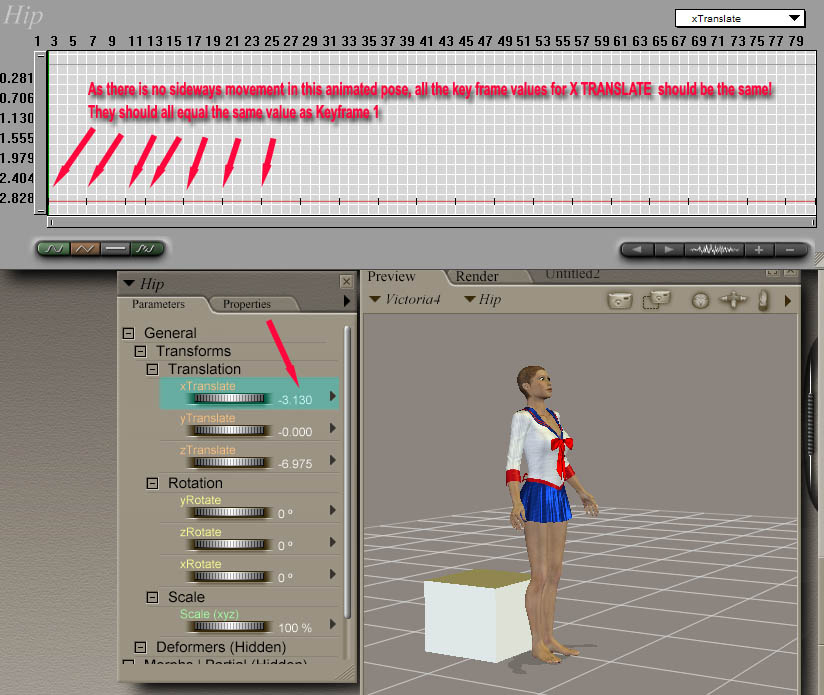
You can place the cursor on each key frame in the Graph Window and check the value next to the translate dial.
For the X Translate Value in this pose, all the values will be the same as the first keyframe because the Sit Down
animated Pose does not move V4 or her hips from side to side.
Things are not the same when we come to do the Z Translate Keyframes shift though, because V4, or her hips, do
indeed move back through the Z axis as she sits down.
The Screenshot on the right ends the move of the X Translate value. When doing the Z value (see below), you will
need to exercise a bit of trial and error to adjust the keyframes after the first one (as a block) to ensure the
sit pose is natural and V4 is not suddenly lurching back.
The screenshot below shows the new positions of the Z keyframes after they were moved (Frames 2 to 80) using the
highlight and CTRL Left Mouse Press move routine.
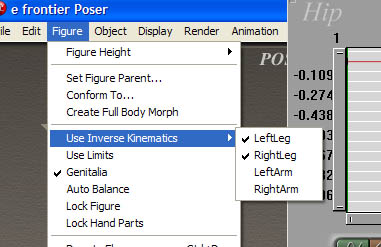
Don't forget to turn back on the Inverse IK for both legs if you are going to add more pose sections
to the sequence!
----------- Return to Menu Index -----------
|
 |
| |
|
| |
----------- Return to Menu Index -----------
|